Category Archives: Tiffins

Senegala Vada (Brown Bengalgram Fritters)

Standard

This is favourite snack, and is available, in various versions, across South Indian households and even restaurants.

IMG_20160702_211934

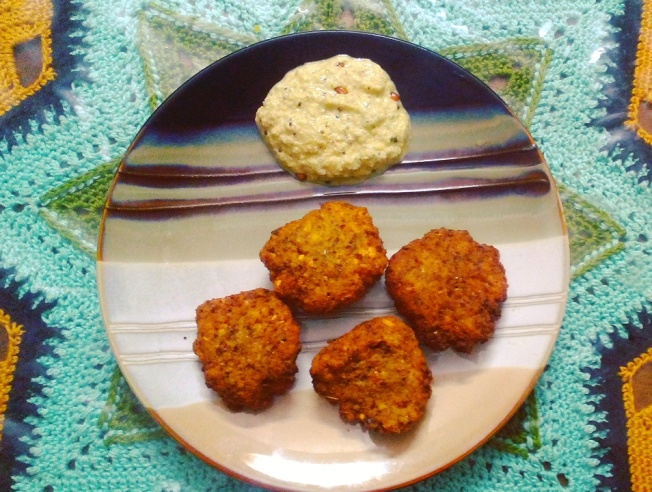
Senegala vada with chutney

This is different from “masala vada” as the masala vada is made with split bengal gram, not the whole one.

Ingredients:

  • 2 cups brown senegalu (chana, whole bengal gram) – soaked and drained.
  • 6-8 green chillies
  • 1″ piece of ginger
  • optional – finely chopped onion
  • optional – croasely ground pepper
  • Chopped curry leaves
  • pinch of asafetida/hing
  • 1 tsp salt
  • Oil for frying
IMG_20160702_200805

The washed senegalu with chillies and ginger

Method:

  • Rough-grind the soaked senegalu. You may add a bit of water to help in the grinding.
  • Add the chillies and ginger and grind again so they are mixed well.
    • Ensure that the senegalu remain rough, and are not finely ground. That would take away from the texture and taste of the final vada.
IMG_20160702_201345

coarsely ground with the chillies and ginger mixed in.

  • remove from jar and add salt and mix well.
  • You may add the other ingredients at this time, and set aside till the oil heats.
  • Wet your fingers and take a bit of the batter and flatten.
    • Ensure that the edges are not broken as this may cause the vada to break while frying.
IMG_20160702_201910

Flatten on your fingers

  • Once the oil is heated enough, gently drop this into the oil for frying.
    • You may also use a plastic sheet for shaping the vadas. They can then be dropped from the sheet into the oil.
  • Turn the vada until it is uniformly brown and then take out.
IMG_20160702_202738

Frying into a lovely brown

  • Put it on a plate lined with kitchen tissue to soak the excess oil.
IMG_20160702_204628

Senegala vada ready!!

Serve hot with coconut chutney! 🙂


Veg Thin-Crust Pizza

Standard
Veg Thin-Crust Pizza

Last night at 7pm, Hubby decided that the best way to watch an action movie is if we have pizza! The normal pizza I always make is usually a part of my bread dough. I simply make a bit extra, and set it aside for the pizza after proofing. At that hour, there isn’t any way I can get proofed dough ready for the 9pm show. Also, we’ve stopped keeping ready-made pizza bases at home, in a drive to lead a healthier lifestyle.

So we got hunting for a recipe I could work with. A few blogs and sites later, I figured out what I wanted to do! The one I made has been inspired by all those blogs, but I made my changes to accommodate our tastes. The end result was definitely a perfect accompaniment to an action movie!!

IMG_20160619_224422

Pizza!

This particular recipe is bound to be a favorite for all those who love thin crusts. For thicker crusts, you need to go through the proofing method before baking. 🙂

Ingredients:

Pizza Base: 

  • 2 cups all-purpose flour / maida
  • 1 tsp instant yeast (or active dry yeast)
    • be sure to proof the active-dry yeast before using. Use water from the 1 cup mentioned below.
  • 1 cup water
  • 1.5 tsp salt

Sauce:

  • 5 ripe medium-size tomatoes
  • few fresh basil leaves
    • Can use 1/2 tsp of dried basil also
  • 1 tsp dried oregano
  • 3/4th tsp salt
  • 2 garlic pods (optional; I did not use)

Toppings:

  • caramelized onions
  • sweet corn
  • chillies
  • chilli flakes
  • diced capsicum
  • cheese of your choice

Method:

Sauce:

  • Blanch the tomatoes by dropping them in boiling water. After 2 mins take them out and drop in a bowl of cold water.
  • Peel the tomatoes and roughly chop them.
  • In a mixer jar, add all the ingredients except salt and grind into a fine puree.
  • Add salt at the end and set aside.
IMG_20160619_201350

Ready to be used sauce

Pizza:

  • Preheat the oven at the highest temperature for 30 minutes
    • My oven goes up to 250 deg C. Please make sure you are able to achieve a good amount of heat within the oven. if your highest temperature is lower, then you may keep it for a few minutes longer.
  • In a bowl, add the yeast and water and mix well.
  • Add the flour and salt and mix well by hand till it becomes a sticky dough.
IMG_20160619_201431

Basic dough, ready to be kneaded

  • Sprinkle a little flour on your work surface and drop the dough on it.
  • Knead the dough thoroughly until it becomes smooth. This may take about 5-8 minutes of kneading. The dough at this point will not stick to the hand.
IMG_20160619_202035

And now we’re ready to make Pizza!

  • You may add a little flour if needed.
  • Cover the dough while you prepare the toppings for the pizza.

    Note:
    To actually bake the pizza, I use the tray that I got with my oven. It is rectangular, but I’m ok with that! 🙂
  • Spread some olive oil on the tray to prevent the base from sticking.
  • Slowly, by hand, spread the base on the tray while keeping the base at least 1/4″ thick.
    • Any thicker, the base will not cook properly and may remain soggy.
    • This step needs a lot of patience. Do not rush this as the base may become too thin and burn or be too thick and raw.
  • Spread the tomato sauce over the base evenly with a bit extra at the edges.
  • Top the sauce with grated cheese.
  • Over the cheese, add all the toppings of choice. You may add a bit of cheese over the toppings also.
IMG_20160619_205244

Ready to bake

  • Bake the pizza for 15 minutes.
    • Make sure to the keep checking as the amount of time varies of the temperature used and the size of the oven.
  • Pull out of the over, cut and serve!!
IMG_20160619_213703

These were almost gone before I remembered to take a pic! 😉


Godhuma Pindi Dosa

Standard

Last night, we were just pondering about what to have for dinner, when Hubby remembered this dosa from his childhood days. His mother had prepared it an a quick and tasty tiffin. Honestly, I was a bit skeptical, since I’d never heard of it before. But a quick search on the internet produced some interesting results. The final result was a quick, healthy and satisfying dinner.

IMG_20160605_210849

Godhuma Pindi dosa with tomato perugu pachadi

Godhuma pindi (wheat flour) dosa is a very quick and satisfying tiffin, especially given that it literally takes 5 minutes to prepare the batter. It is easy to make, and pretty satisfying while staying health. A win-win all around…

Ingredients:

Batter:

  • 1 cup godhuma pindi (wheat flour)
  • 1 cup rice flour
  • 1 tsp salt
  • Water to mix the batter
  • cooking oil

Toppings on dosa (optional):

  • finely chopped green chillies
  • finely chopped ginger
  • jeera

Method:

  • Mix all the batter ingredients to pouring consistency. Make it a little thinner than normal dosa batter.
  • Keep all the toppings ready
  • Place an iron skillet on medium flame and let heat properly. Spread a little oil to ensure it is ready for the dosa.
  • Once the skillet is well heated, pour the batter outside in, like a rava dosa.
    • The dosa does resemble a rava dosa in the “holeyness”.
IMG_20160605_205517

With the toppings of choice

  • sprinkle on the toppings of choice and add some oil to the outside of the dosa.
  • Once done, the edge will turn lightly brown and start to lift off the skillet.
  • Flip over and roast till done.
IMG_20160605_205559

After flipping over..

  • Flip back, fold over and serve hot.
IMG_20160605_210449

The inside is nicely roasted too!

This dosa can be had with any kind of chutney and is best served hot. The wheat flour adds a bit of healthiness to the evening tiffin, while is very quick and easy to make!